Why
I was walking around Central Park with a friend, and we talked about how time has a very non-linear and exponential return pattern: there’s not much you can do with 30 minutes and 20 dollars. But with 6 hours, and a hundred dollars, the possibilities are endless.
An office chair race around the block? A DIY mixed drink night? Building a huge tower of cards?
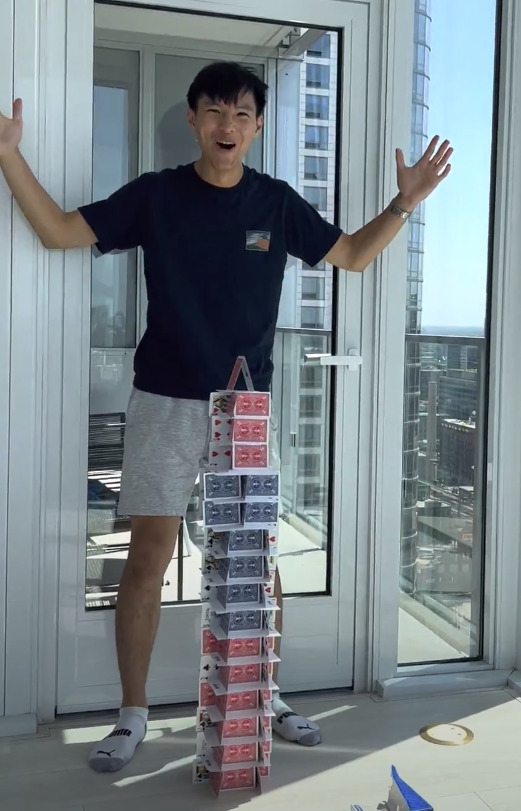
The tower of cards stuck in my head, and I knew I had to build it.
Prototyping
Before I went for the “epic” build, I ran a quick prototype that was much smaller, and only a few feet tall.
Here are a few of the things I learned:
-
Air-cushion cards over smooth cards.
- Smooth-backed cards have absolutely no friction and are a nightmare to work with.
-
Paper is absolutely essential
- Fiber in the paper causes high friction that stops the bottom edge of cards from sliding out
- Paper also provides very high in-plane tensile strength
- I think this is well within the spirit of the build, I decide the rules haha
-
Card towers have spring constants, I’ll elaborate more on this later!
Design
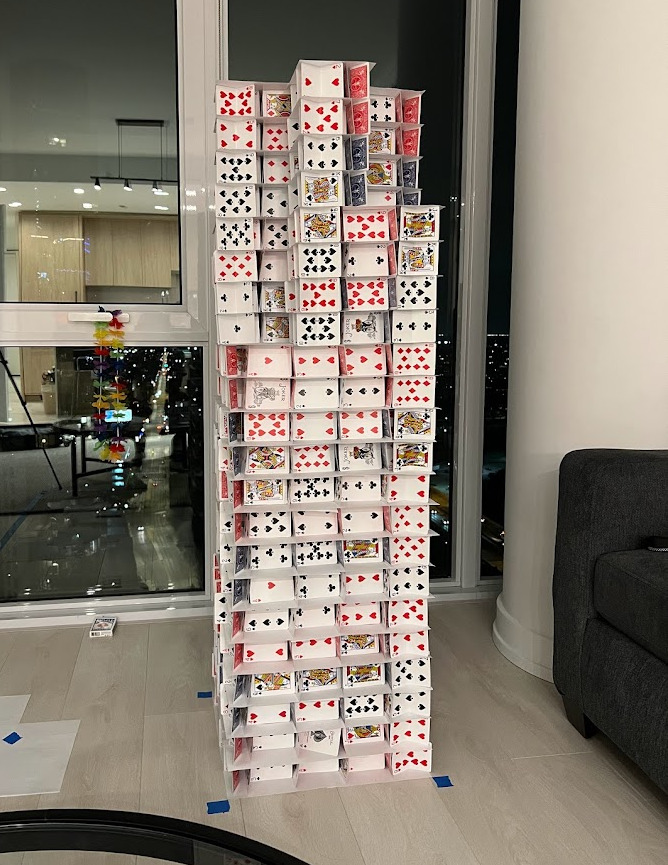
I wanted to build something tall, something interesting, and something with card-friendly geometry. I also happened to be in Chicago, so the Willis Tower immediately came to mind.
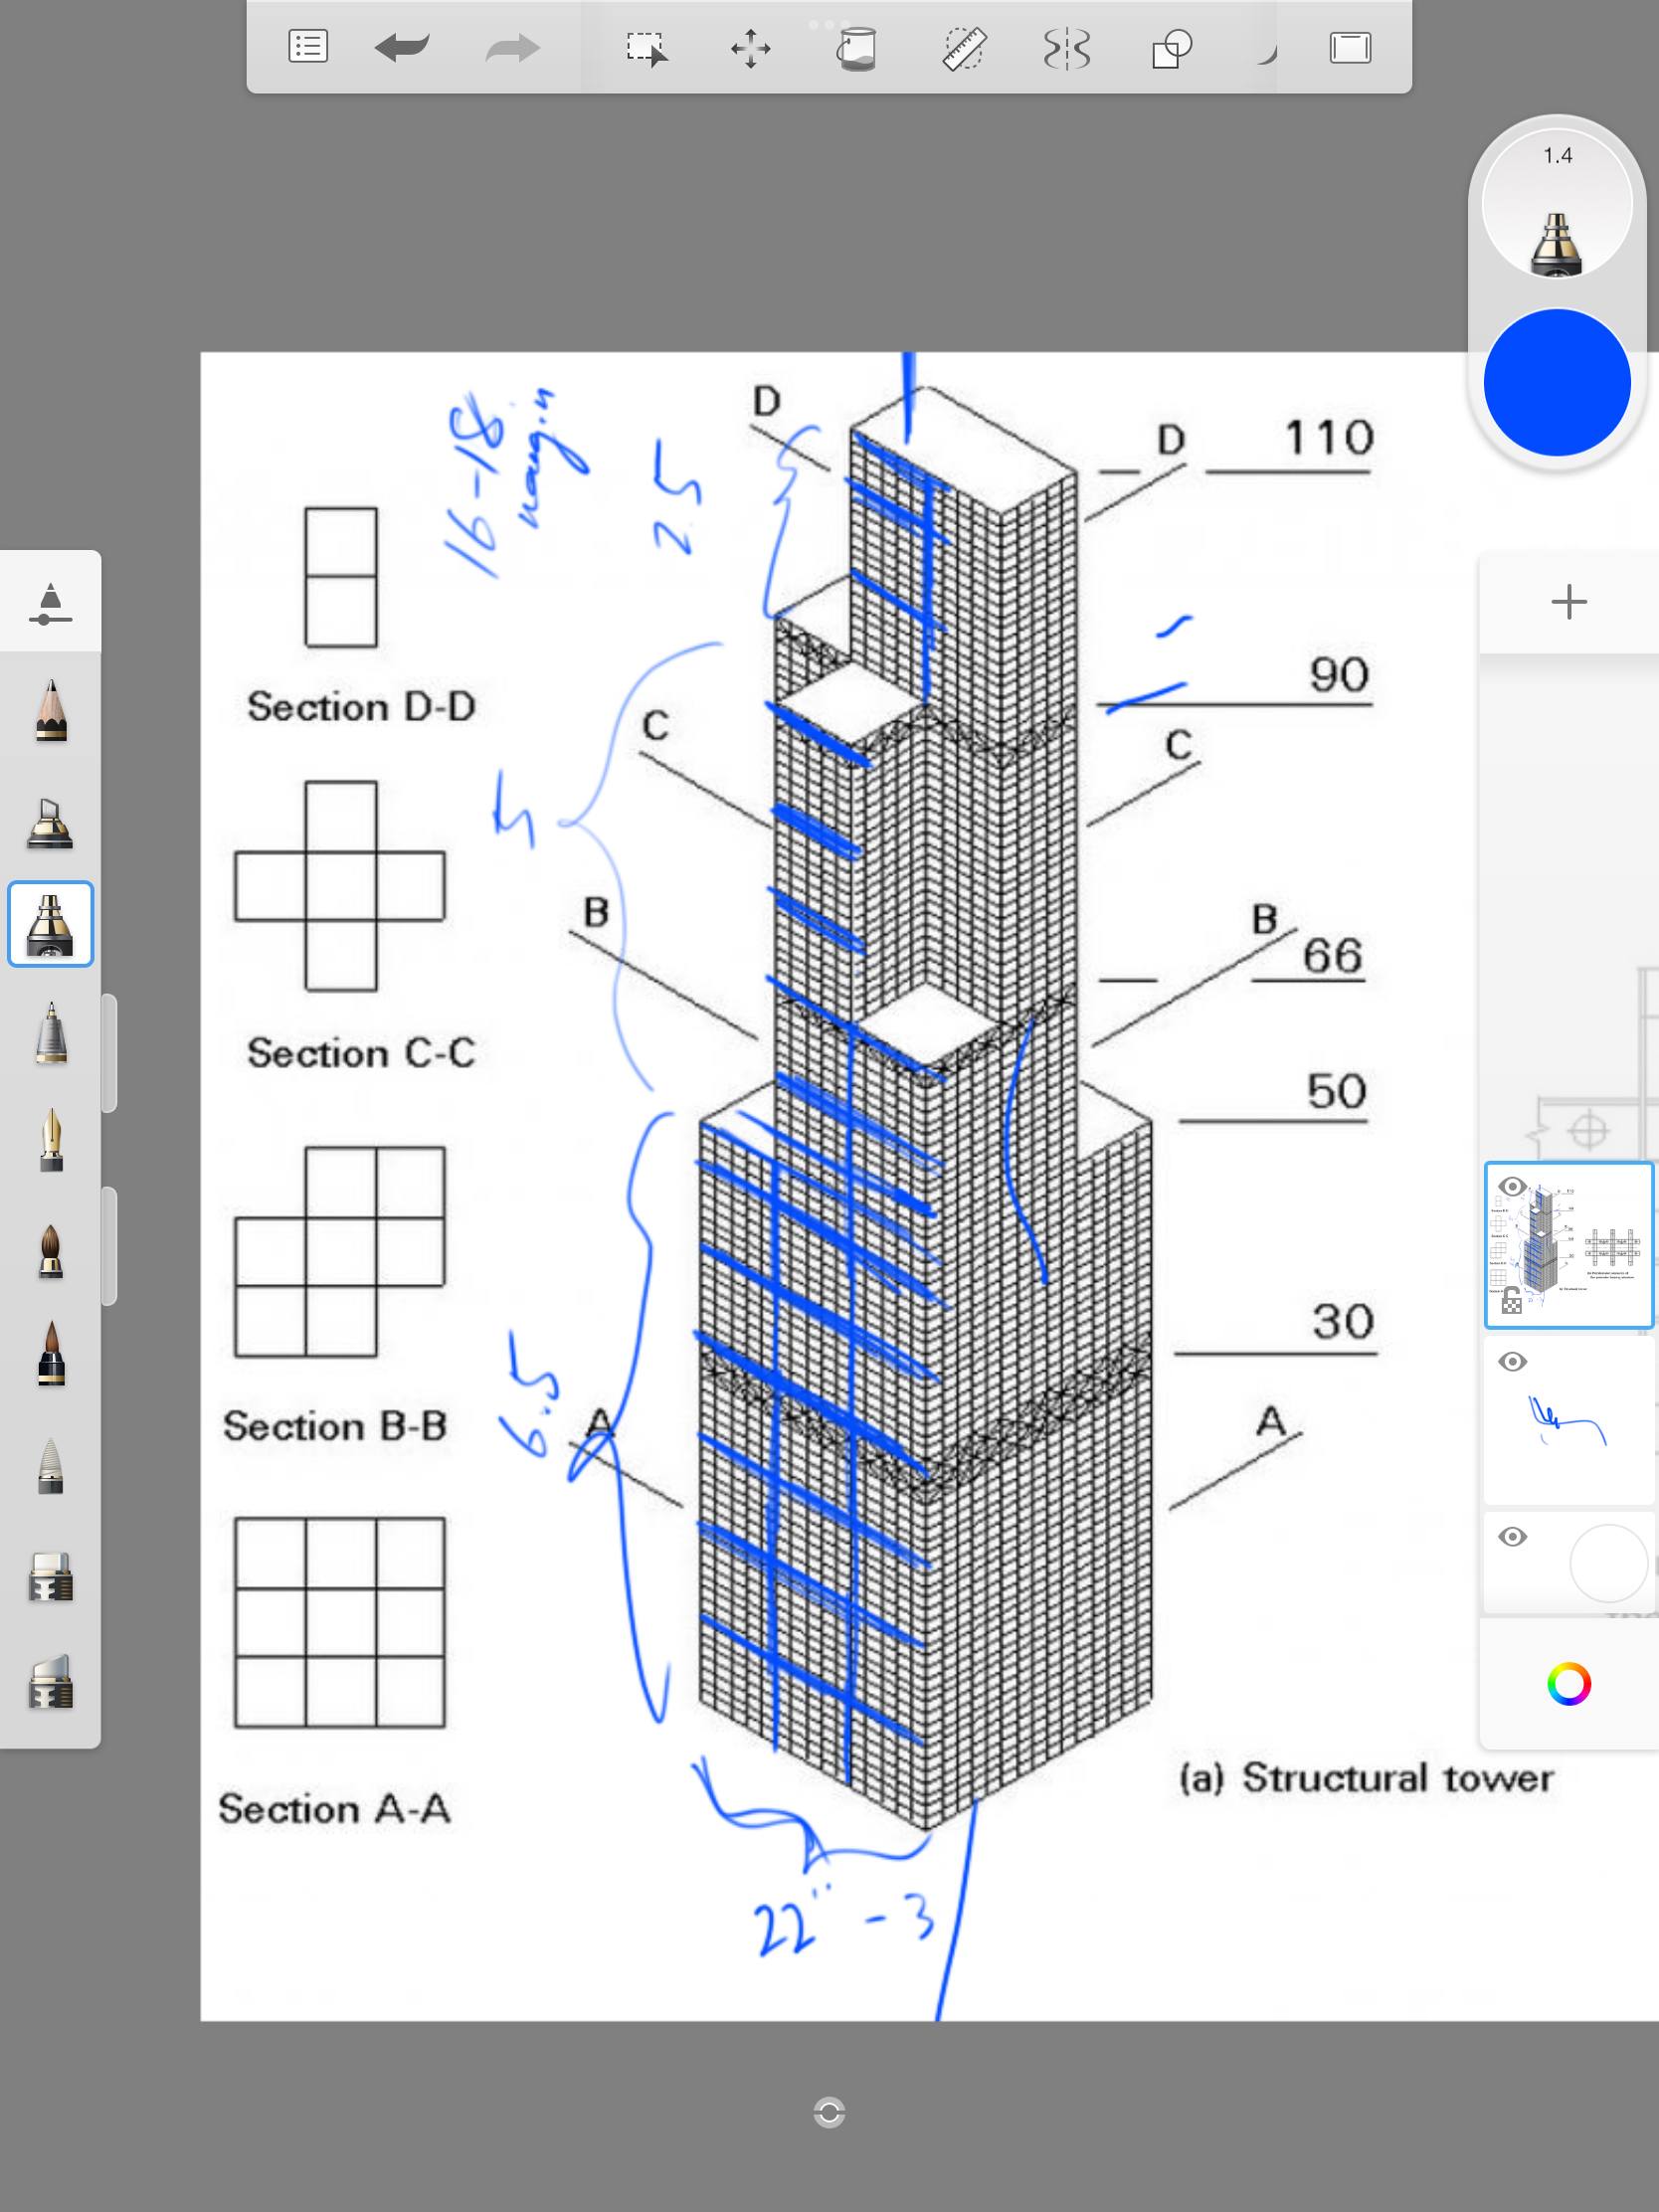

I found a 3D breakdown of the dimensions of the Willis Tower and annotated it on an iPad with rough measurements. As the Willis Tower consists of a 3 x 3 grid, I decided to make the length of a single sheet of paper 2 “units” to minimize the amount of paper cutting. That means that one “unit” is 5.5”.
Using simple ratios, given that the base was 3 units long, this makes the base 16.5” x 16.5”. And since the tower was about 16.5 units tall, this means the projected height of the tower would be 90.75”, or Yao Ming (7’ 6”) + 0.75” haha. This was an important calculation to verify to make sure I wouldn’t hit the ceiling. The ceiling seemed to be 11ft ish, so we were all set.
Materials:
Base
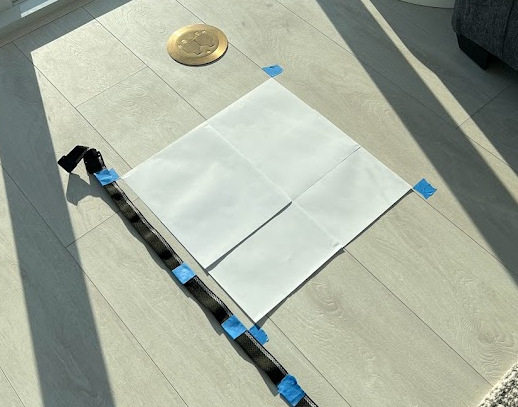
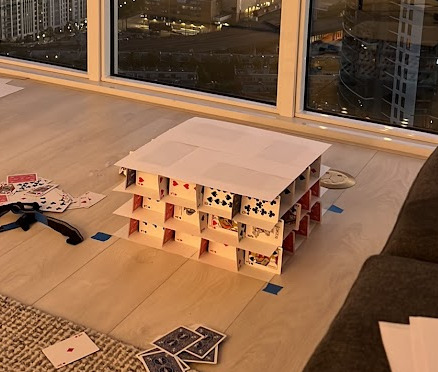
I used sheets of paper themselves to measure out the 16.5” x 16.5” base. Then I started stacking.
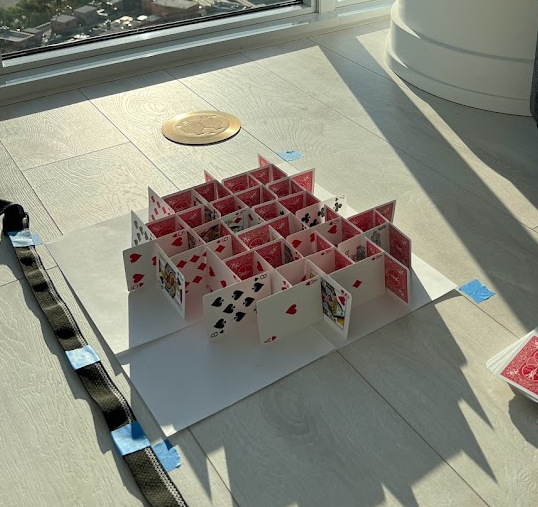
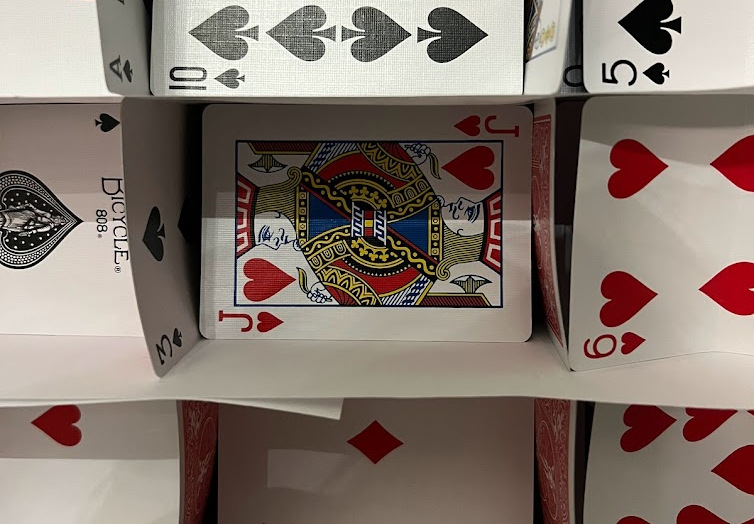
The stacking method I used is called the “four-card cell”.
This boxed shape is much stronger than the standard triangular cell as each card is near vertical, and you even have some fault tolerance depending on how the cards are leaned.
Once I finished a layer, (taking care to keep the numbers outward-facing for a consistent aesthetic), I would cap it off with the required sheets of paper.
Growing the Tower
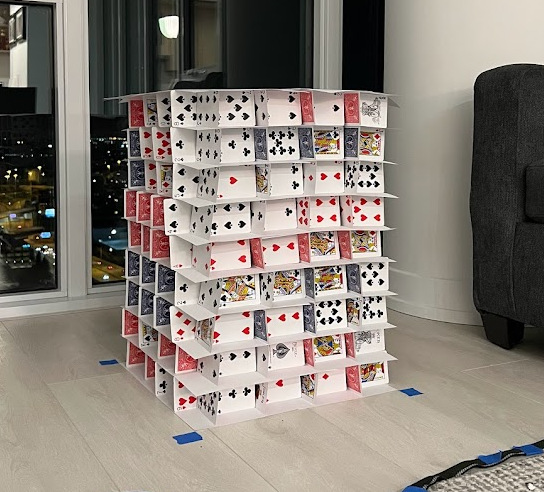
As the tower grew, it became tough to line up each new floor directly below it. For the floors (sheets of paper) I essentially stared down the corners from above and tried to make sure they were in line. To line up the cards themselves, I took advantage of the translucency of the cards and patterned off the faint edges of the cards through the paper. I also improvised a measuring tape to try and center the cell in the middle of the 3 x 3 grid.
Overall, my philosophy for this build was not to achieve perfection, but to instead: design and build on the fly. I thought it would be more fun to overcome engineering challenges as they come up. And lastly, I knew that my structure should easily have enough structural margin to tolerate small misalignments as the tower grew taller.
Corner Supports

Corner supports are the first “hotfix” I came up with as I built. Since cards sticking out halfway would be unstable, edges often have overhangs over “unstable” regions. This is especially noticeable at corners. As an edge/corner droops, it lowers the starting height of the card directly above it, causing the next edge/corner to droop further. This issue compounds as you add layers.
Eventually, a card on top of a drooped floor teeters on just tipping/sliding off, preventing you from stacking any higher. Thus, I had to develop a fix to go beyond about twelve card layers.
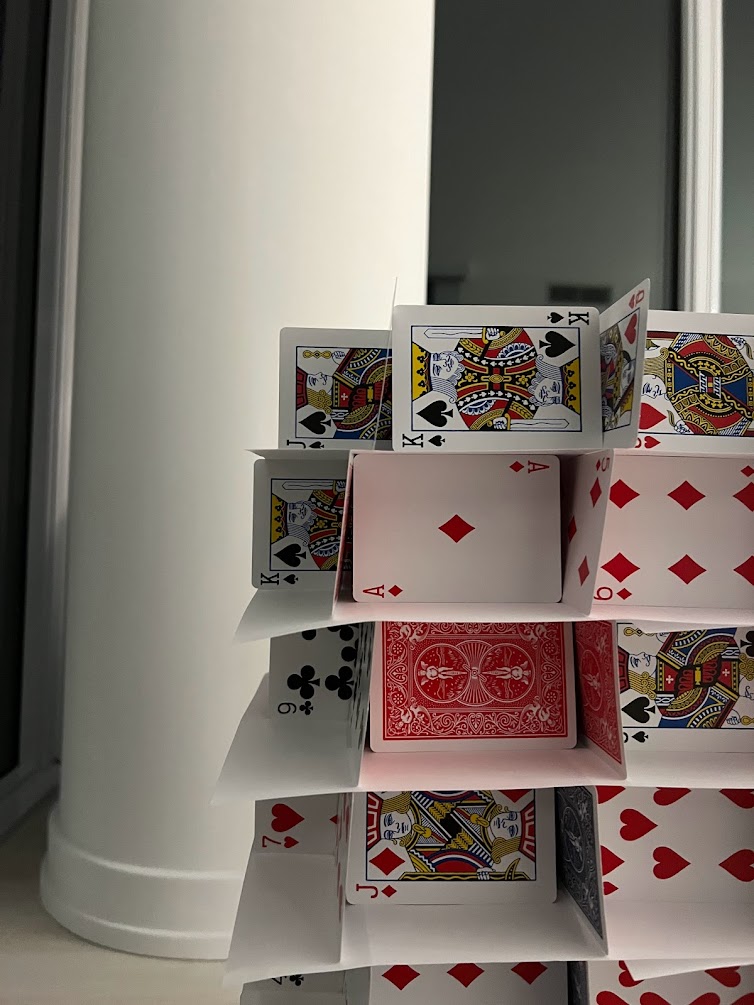
The hotfix I added was a folded card corner support. The folded angle of the card allows it to stand on edges/corners without having to lean on anything, making it ideal to add strength to the voids near the edges/corners. I deemed the issue only severe enough at the corners, so I put two in each corner.
Since corner supports also don’t lean on anything, they use their full width to prop up the tower (as opposed to the 98% height that leaned cards have). The net sum effect of drooping and the full width let corners be restored to the same height as the center cells.
Hotfix complete!
Upper Levels
As the upper levels had cells cut away from the corners and edges, they had higher perimeter-to-area ratios. This meant that per floor, there was much more relative edge void space compared to rigid central cells. In order to combat the additional drooping, I added corner supports to the increased number of corner positions.
As the tower got taller, the weight of the upper levels began to increase the loading on the few base layers. This caused noticeable bending.
This was slightly concerning, but interestingly: the bending/buckling action was braced by the cards to either side of any given card. Therefore, a buckling failure of a layer would require sliding off the paper, which was unlikely. As the tower gets heavier, it increases the loading into the paper, increasing the frictional force keeping the cards from sliding out.
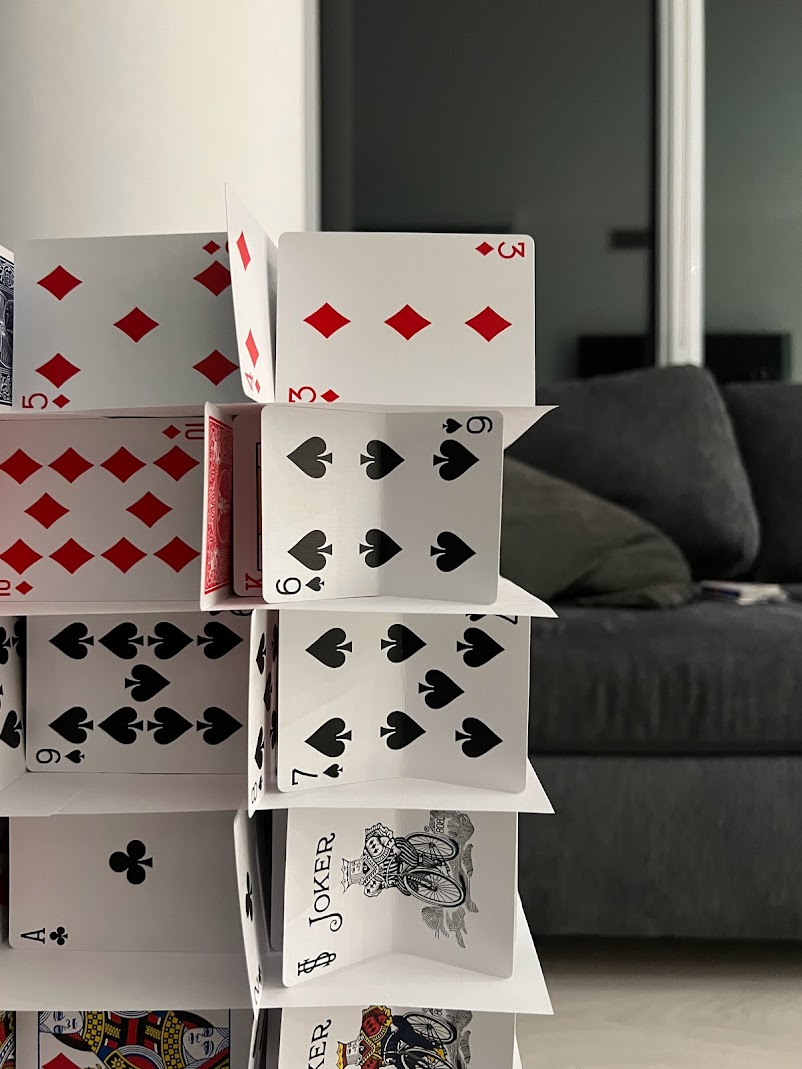
Return of the Spring Constant
But even if the bending and buckling would not cause a direct loading failure, it did add a lot of compliance due to the flexure. This revealed itself in spring-like behavior. If you bumped the deck or a card as you were stacking, the entire tower would spring away and wobble back with deflections that got larger as the tower got taller. At final levels, the deflection was easily on the order of 5 mm.
I found this quite interesting as the spring-like behavior was driven mostly by compliance as opposed to being driven by an elastic modulus of the paper.
I anticipated this issue as I saw it very early on in the skinny high aspect ratio prototype tower. This is one reason I made sure to choose a design with a slightly more reasonable aspect ratio.
But once the effect takes hold, the only possible mitigation is to be careful, gentle, and patient as you stack cards.
Indeed being careful is often a great strategy.
Final Levels
Once you reach the final levels, you know it’s getting real when you need a chair. These are the most fun layers, and also the scariest as everything is so shaky due to the springiness.
The final antenna towers were made by tearing the cards a bit and interleaving heavily curled cards.

Yay! :)
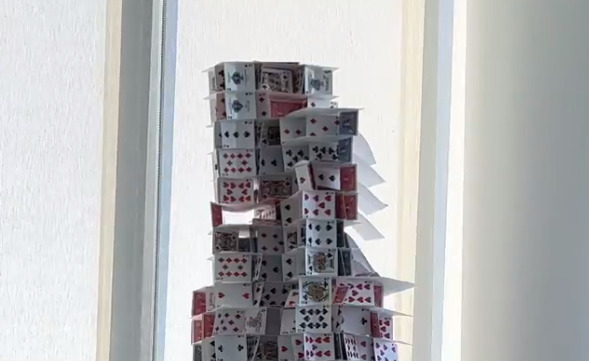
Death by a Thousand Cuts
I thought it would be the most fitting if we took down the tower by throwing cards at it. After all, that’s how I took down the prototype too.
I invited many of my friends, and we all stood about 5 meters away and just started chucking. Quickly we improved, but overall we probably had a 10% hit rate combined. Out of those that hit only 30% ish had enough speed to do any damage. It turns out that the weight of the tower put the cards under enough load that cards would often just bounce off.
It was the small fraction of high-speed cards that hit that slowly took out the tower.
As the cards from the tower fell onto the ground, we could also collect them to throw back at the tower. We used the tower against itself. There were easily 5+ decks of cards (~50 each), and we had to “re-collect cards” easily 5+ times, so quick napkin math shows we really did deliver death by 1000+ cuts.
Spaced Armor
When you knocked out a few cells, they rarely cascaded and pulled down the rest of the structure with it. Logically this makes sense as all the walls are independent of each other, and the tangential load of a hanging sheet of paper was well within the margin of the structure.
As a result, unsupported sheets of paper drooped over instead of fully collapsing, forming “spaced-armor” over the vulnerable cards. This made it difficult to damage the tower.
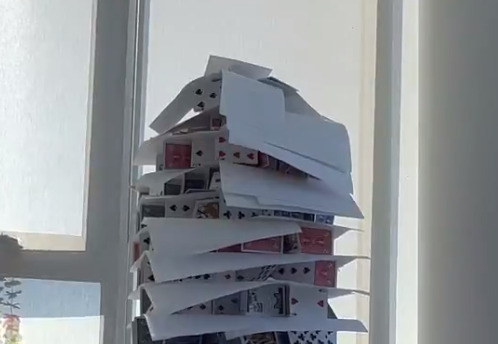
The Last Stand
At this point, we had probably been throwing for over an hour, and our arms were getting quite tired and sore. Despite even stepping forward to throw from only 2 meters away, we still could not deliver a killing blow.
We decided to step it up a notch and throw entire decks of cards (still inside the box). These were the killing blows.
Reflection
Looking back, sometimes I feel like we ask ourselves, why do we do things like this? What is the value of toy engineering projects?
The answer I tell myself is that it’s a novel mental exercise to apply skills, theory, and philosophies to problems in a completely different field. It was fun to use rapid prototyping styles for a new material I had never worked with and to develop best practices on the fly. It was fun to try and explain why certain behaviors were happening, and then design around them.
And maybe it was just awesome and cool. Inspiration and teaching are some of the best ways we can motivate progress. The tower gave me something to look forward to, and something to nerd out over with fellow engineers. Projects like these remind us that there are so many problems out there waiting to be solved, challenges waiting to be overcome. Someone just needs to dream of the solution, chase it, and tackle it.
To dream that it is possible. That anything is possible.
Why should we go to Mars? Because it’s there.
Final Tips
- Use a mask when building, it stops your breath from knocking cards down.
- Wash your hands often to prevent cards from sticking to your hand if you get sweaty hands.
- Document your progress! It’s fun to learn and build at the same time.
- Have fun! :)